The following 17 slides constitute an Ignite talk given at deviantART's technology team meetup in France, earlier this month.
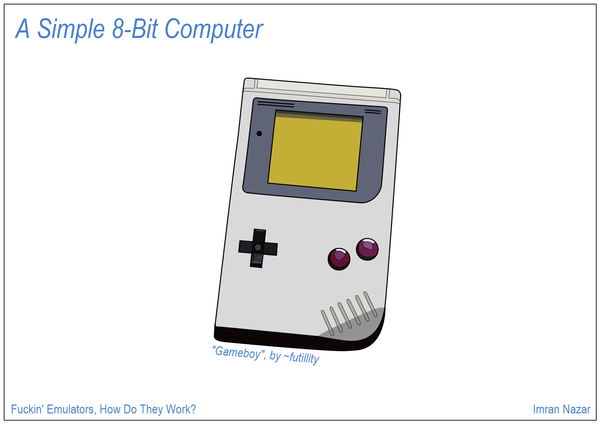
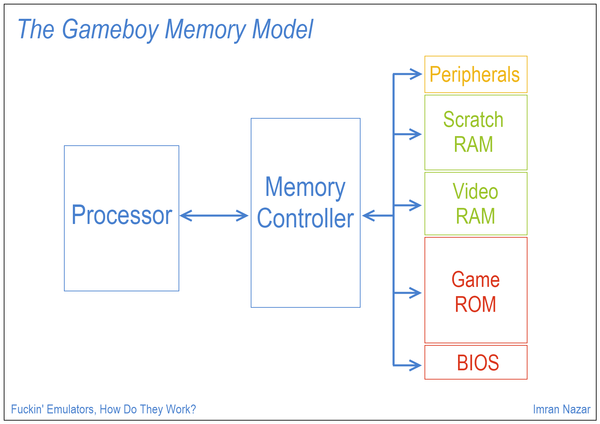
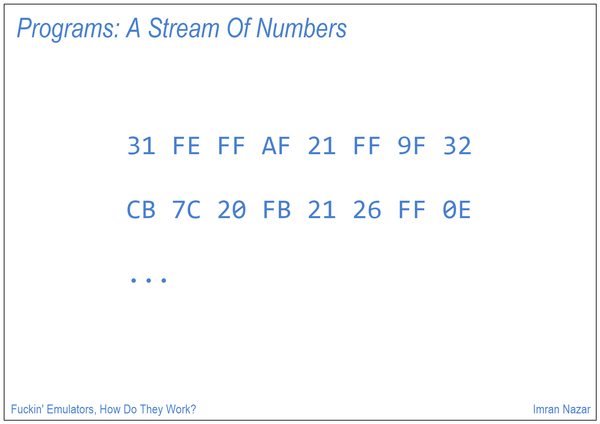
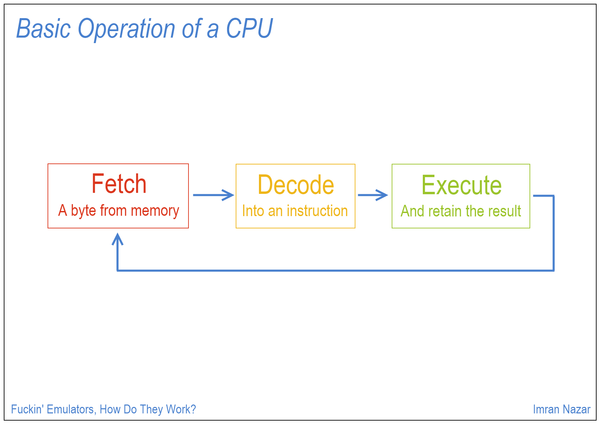
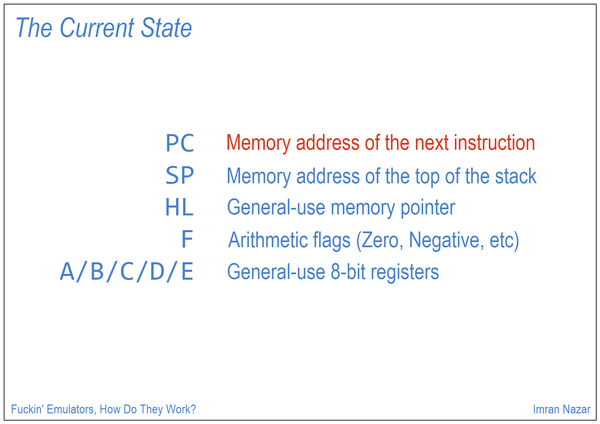
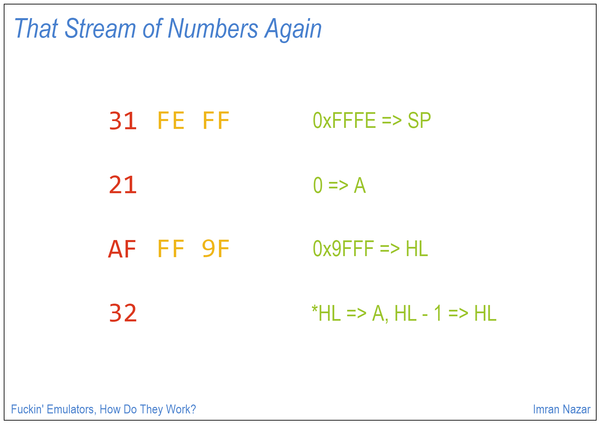
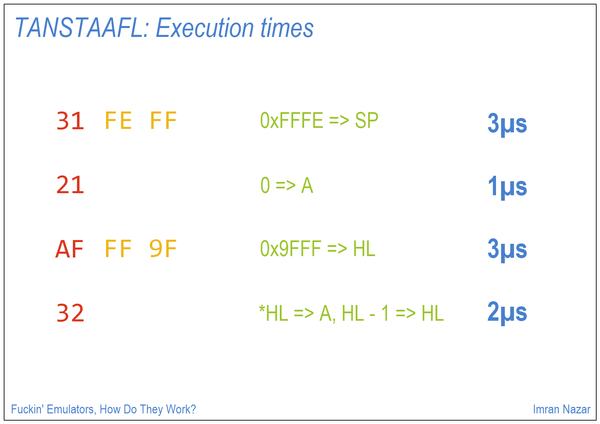
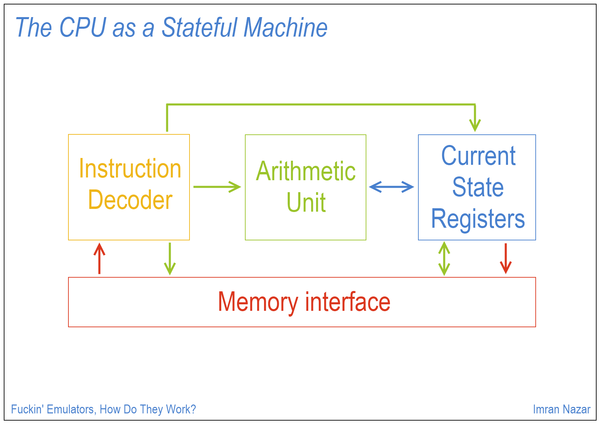
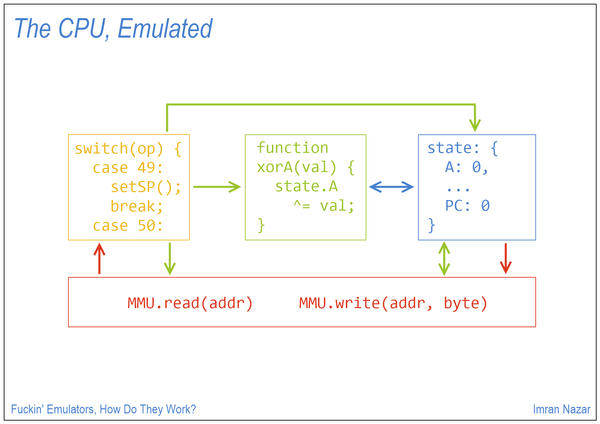
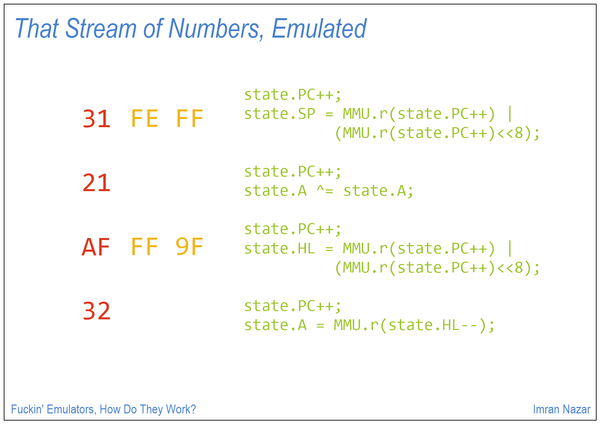
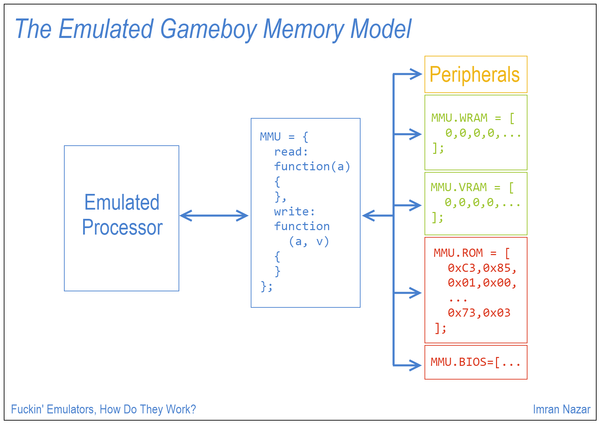
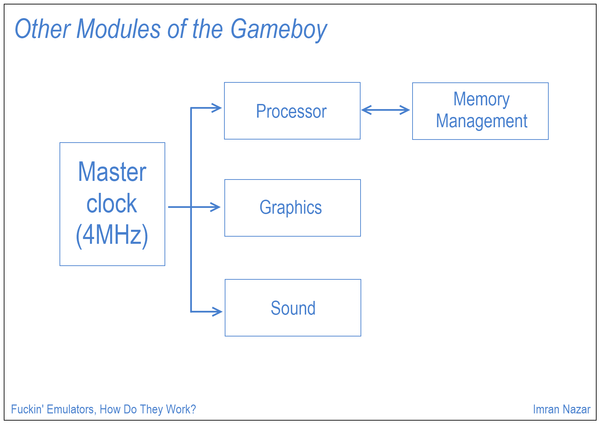
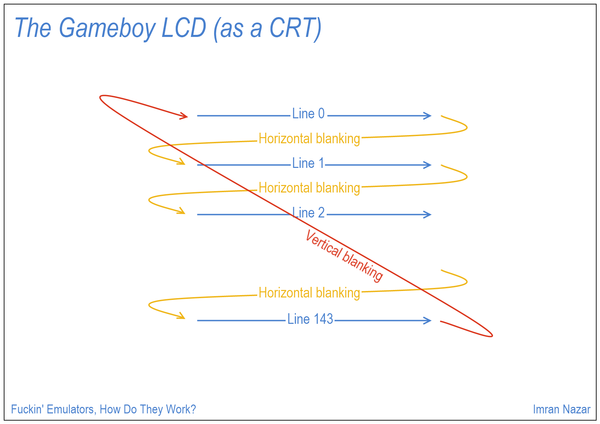
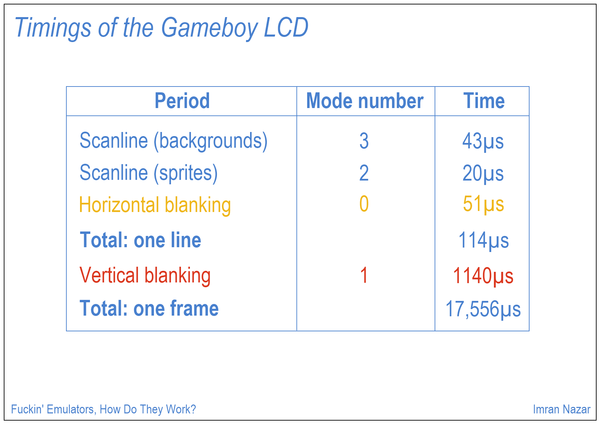
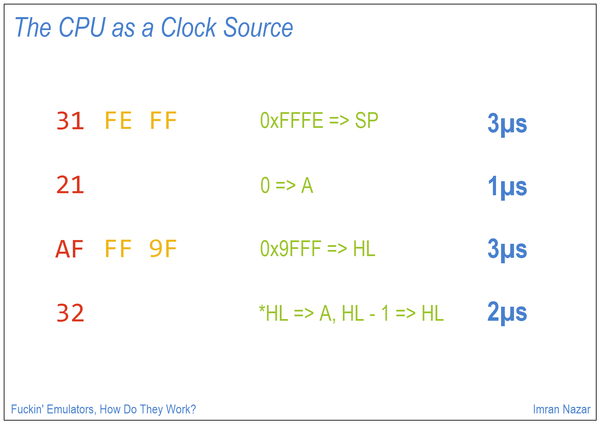
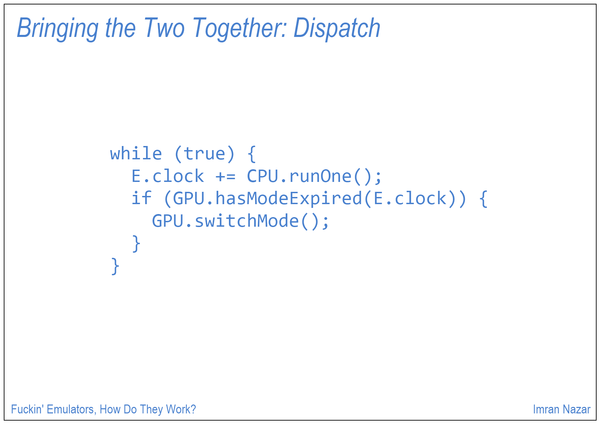
I've written a couple of emulation cores in my time, and people often ask me how computer emulators work. Well, let's take an example...Doesn't look like a computer: there's no keyboard, no hard disk. But all the central components are there: processor, memory, keypad input, screen.This is how the Gameboy looks on the inside: A processor talks, through a memory interface, to various memories. The program sits in one of those memories, but what _is_ the program?All a program is, is a set of numbers. Each number means something to the processor, and it goes through a simple construct to work out what the number means.Take a number from the "current location", work out what it means, do that. Fetch, Decode, Execute. How does the CPU know what the "current location" is, though?As long as the CPU's running, it holds onto a few state variables. One of those is the "current location", or where to find the next instruction. There are others, to help with calculation.Once we have a number, we decode it. Most instructions will either change one of the state variables, or change a piece of memory; some might request more numbers from the program to fully decode.One thing to keep in mind is that none of this is free: it all takes time. For now, that's unimportant, but make a mental note of it.To implement the Fetch/Decode/Execute cycle, the CPU needs a few distinct blocks of functionality, and an interface to memory in order to get more program, and hold onto results.To emulate the cycle, we tear each block out and replace it with JavaScript: a big switch() to decode, discrete functions to execute routines and update the state, and a plain object to hold the state.So those instructions we saw earlier, they become JS. Notice how each instruction changes PC, the "current location", so it points at the next one in the line.That's the CPU: the memories are easy to emulate. They're just huge arrays. The interface object, "MMU", takes care of mapping out which memory the CPU's looking to talk to; that's generally another switch().All well and good, but the CPU's plugging away without showing anything. Ideally, we need to emulate the other pieces: graphics, sound, keypad. The most important, of course, is graphics.The Gameboy has 144 lines on its screen, and the graphics chip treats the screen like a traditional tube: scan a line, fly back to the left, at the bottom take a long time to fly back to the top-left.Each of those scanlines, and blanking periods, has a precise time for how long it should take. But we're emulating the whole system, at a low precision.Remember these from earlier; they allow the CPU to act as "emulated time". We can count the CPU instruction times, and know when to draw a GPU's scanline.We end up with a central dispatcher, which runs the CPU until it's time to switch GPU mode. And that's a (very) basic introduction to how emulators work.