The source code to this project is now available in full, at: http://imrannazar.com/content/files/android-sobel.zip
One of the most demanding tasks for a smartphone application to take on is "augmented reality": producing a display of the world with information overlaid in real-time. This is generally done by using the smartphone's camera, in preview mode, to provide a base for a translucent overlay; the intensity of the task lies in calculating the contents of the overlay in a time-sensitive environment.
This article hopes to provide a gentle two-part introduction to augmented reality as implemented on Android-based smartphone devices. The process will be introduced using the example of an edge detector run on the camera's current view, and updated alongside the camera view in real-time. Many of the processes involved in producing such a view will apply to any software that seeks to provide a view based on the camera, so the code presented here will have wider application to programs of this class.
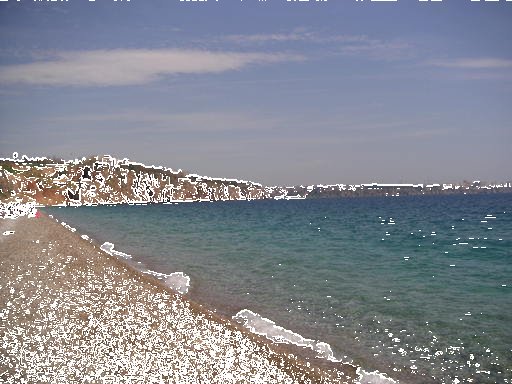
The edge detection algorithm that will be used in this article is the Sobel operator; the algorithm will be covered in detail later, but the application developed here will, as a whole, be named after this operator. An example output for the application is shown below.
Providing a camera view
In order to overlay data on the camera preview screen, it's a prerequisite to be able to display the camera preview; this is done by rendering the preview onto a surface. For that to occur, the simplest method is to place a SurfaceView-type view on the application's main layout, and position it such that it covers the screen. This can be done through the standard layout XML:
res/layout/main.xml: Main layout for camera preview
<?xml version="1.0" encoding="utf-8"?><FrameLayout xmlns:android="http://schemas.android.com/apk/res/android" android:orientation="vertical" android:layout_width="fill_parent" android:layout_height="fill_parent"> <SurfaceView android:id="@+id/surface_camera" android:layout_width="fill_parent" android:layout_height="fill_parent" /> </FrameLayout>
With a SurfaceView made available, the application's main activity can place a surface and its associated canvas onto the view. To do this, the application needs to act as a SurfaceHolder, and implement the methods of a SurfaceHolder.Callback; this allows the Android operating system to treat the activity as an end-point for rendering surfaces. In code, it's a simple process to define an activity as a surface holder callback: three methods are made available by the SurfaceHolder.Callback interface.
src/sobel/Sobel.java: Main activity
package sobel;
public class Sobel extends Activity implements SurfaceHolder.Callback
{
    /* Activity event handlers */
    // Called when activity is initialised by OS
    @Override
    public voidonCreate(Bundle inst)
    {
    	super.onCreate(inst);
	setContentView(R.layout.main);

	// Initialise camera
	initCamera();
    }

    // Called when activity is closed by OS
    @Override
    public void onDestroy()
    {
        // Turn off the camera
	stopCamera();
    }

    /* SurfaceHolder event handlers */
    // Called when the surface is first created
    public void surfaceCreated(SurfaceHolder sh)
    {
        // No action required
    }

    // Called when surface dimensions etc change
    public void surfaceChanged(SurfaceHolder sh,
                               int format,
			       int width,
			       int height)
    {
        // Start camera preview
	startCamera(sh, width, height);
    }

    // Called when the surface is closed/destroyed
    public void surfaceDestroyed(SurfaceHolder sh)
    {
        // No action required
    }
}
The above code will deal with the initialisation of the application and its surface, but the camera hardware needs to be initialised and setup for the preview to be available. This is done in three steps:
- Open the camera, when the application is initialised;
- Set parameters for the camera, including the width and height of the preview;
- Start preview and set surface for the preview output.
The camera helper functions mentioned in the above code sample can be filled in to perform these steps:
src/sobel/Sobel.java: Camera initialisation
    private Camera mCam;
    private SurfaceView mCamSV;
    private SurfaceHolder mCamSH;

    // Initialise camera and surface
    private void initCamera()
    {
    	mCamSV = (SurfaceView)findViewById(R.id.surface_camera);
	mCamSH = mCamSV.getHolder();
	mCamSH.addCallback(this);

	mCam = Camera.open();
    }

    // Setup camera based on surface parameters
    private void startCamera(SurfaceHolder sh, int width, int height)
    {
    	Camera.Parameters p = mCam.getParameters();
	p.setPreviewSize(width, height);

	mCam.setParameters(p);

	try
	{
	    mCam.setPreviewDisplay(sh);
	}
	catch(Exception e)
	{
	    // Log surface setting exceptions
	}

	mCam.startPreview();
    }

    // Stop camera when application ends
    private void stopCamera()
    {
        mCamSH.removeCallback(this);

    	mCam.stopPreview();
	mCam.release();
    }
One consideration to make when setting up the camera is that the size of the surface prepared for preview may not be a size supported by the camera subsystem. If this is the case, and the activity attempts to set a preview size based on the surface size, the application may force-close when it starts. A work-around for this is not to use the surface's dimensions when setting a preview size, but instead to ask the camera which preview sizes are supported, and to use one of those. The list of preview sizes can be retrieved through the camera's Parameters object:
src/sobel/Sobel.java: Using supported preview sizes
    private void startCamera(SurfaceHolder sh, int width, int height)
    {
    	Camera.Parameters p = mCam.getParameters();
	for(Camera.Size s : p.getSupportedPreviewSizes())
	{
	    // In this instance, simply use the first available
	    // preview size; could be refined to find the closest
	    // values to the surface size
	    p.setPreviewSize(s.width, s.height);
	    break;
	}

	mCam.setParameters(p);

	try
	{
	    mCam.setPreviewDisplay(sh);
	}
	catch(Exception e)
	{
	    // Log surface setting exceptions
	}

	mCam.startPreview();
    }
The application is now equipped to produce a preview of the camera's current field of view. The preview may appear alongside an application title bar, notification area and so forth; to remove these and gain an unobstructed rendering of the preview, the application can request to be made fullscreen:
src/sobel/Sobel.java: Fullscreen activity
    @Override
    public void onCreate(Bundle inst)
    {
    	super.onCreate(inst);

	getWindow().setFlags(WindowManager.LayoutParams.FLAG_FULLSCREEN,
	                     WindowManager.LayoutParams.FLAG_FULLSCREEN);
	setContentView(R.layout.main);
	initCamera();
    }
Providing an overlay
Now that the camera preview is being rendered into a SurfaceView, the next step in augmented reality is the ability to draw pixels and/or shapes over the preview image. Since the camera hardware is directly drawing to the surface made available to it, this surface cannot be used for additional drawing: any output made to the surface will be automatically overwritten by the camera.
This problem can be resolved by providing an additional surface, positioned over the top of the camera preview, onto which things can be drawn by the application. The new surface can also be a SurfaceView, but if the base Android view is utilised in this instance, it cannot be used to draw dynamic content: the SurfaceView must be extended into a new class. For the purposes of this application, the class can be referred to as OverlayView:
src/sobel/OverlayView.java: Class definition
package sobel;
public class OverlayView extends SurfaceView
{
    private SurfaceHolder mOverSH;

    public void OverlayView(Context ctx, AttributeSet attr)
    {
    	super(ctx, attr);

	mOverSH = getHolder();
    }
}
src/sobel/Sobel.java: Initialising the OverlayView
    private OverlayView mOverSV;

    private void initCamera()
    {
    	mCamSV = (SurfaceView)findViewById(R.id.surface_camera);
	mCamSH = mCamSV.getHolder();
	mCamSH.addCallback(this);

	mCam = Camera.open();

	mOverSV = (OverlayView)findViewById(R.id.surface_overlay);
	mOverSV.getHolder().setFormat(PixelFormat.TRANSLUCENT);
	mOverSV.setCamera(mCam);
    }

    private void startCamera(SurfaceHolder sh, int width, int height)
    {
    	Camera.Parameters p = mCam.getParameters();
	for(Camera.Size s : p.getSupportedPreviewSizes())
	{
	    p.setPreviewSize(s.width, s.height);
	    mOverSV.setPreviewSize(s);
	    break;
	}
	// ...
    }
In order to lay this new view class over the camera's preview surface, the layout XML needs to be modified to load in the overlay view beforehand:
res/layout/main.xml: Main layout for overlaid preview
<?xml version="1.0" encoding="utf-8"?><FrameLayout xmlns:android="http://schemas.android.com/apk/res/android" android:orientation="vertical" android:layout_width="fill_parent" android:layout_height="fill_parent"> <sobel.OverlayView android:id="@+id/surface_overlay" android:layout_width="fill_parent" android:layout_height="fill_parent" /> <SurfaceView android:id="@+id/surface_camera" android:layout_width="fill_parent" android:layout_height="fill_parent" /> </FrameLayout>
With an overlay in place, the content on the overlay needs to be drawn, and regularly updated. Drawing onto a surface is a familiar concept from computer graphics, requiring the locking of a canvas and the drawing of primitives to the canvas; keeping the canvas regularly updated against the camera preview is a little less familiar. A regular update can be achieved in one of two ways:
- Timing: A method of the OverlayView is called every few milliseconds, which fetches the current camera preview from its rendered surface. This is a theoretically sound concept, but the camera hardware keeps the preview surface permanently locked, so the application is unable to gain access to it.
- Callback: A method of the OverlayView is defined as a "preview callback", and is called automatically by the camera hardware whenever a preview is rendered. The innate advantage to this method is that the camera provides a
byte[]of the contents of the camera preview, which can easily be used for calculation of an overlay.
To set up a callback to a method in the OverlayView, the view must first know about the camera: a handle to the camera must be passed over from the main activity. In addition, it's useful for the OverlayView to know the size of preview image it's working with, since the callback method doesn't provide dimensions. The calls to these methods can be seen in the above code sample from Sobel.java, made at initialisation time; the methods are outlined below.
src/sobel/OverlayView.java: Setting up a callback
    private Camera mCam;
    private Camera.Size mFrameSize;

    // Called by Sobel.surfaceChanged, to set dimensions
    private void setPreviewSize(Camera.Size s)
    {
        mFrameSize = s;
	mFrameCount = 0;
    }

    // Called by Sobel.initCamera, to set callback
    private void setCamera(Camera c)
    {
        mCam = c;
	mCam.setPreviewCallback(new PreviewCallback()
	{
            private int mFrameCount;

	    // Called by camera hardware, with preview frame
	    public void onPreviewFrame(byte[] frame, Camera c)
	    {
		Canvas cOver = mOverSH.lockCanvas(null);
		try
		{
	            // Perform overlay rendering here
		    // Here, draw an incrementing number onscreen
		    Paint pt = new Paint();
		    pt.setColor(Color.WHITE);
		    pt.setTextSize(16);
		    cOver.drawText(Integer.toString(mFrameCount++),
		                   10, 10, pt);
		}
		catch(Exception e)
		{
		    // Log/trap rendering errors
		}
		finally
		{
		    mOverSH.unlockCanvasAndPost(cOver);
		}
	    }
	});
    }
Running the above code on hardware results in something akin to the following image:
In Part 2: Edge detection
The above code takes the application to a point where it can retrieve data from the camera preview (through the preview frame callback's byte[] parameter), and render an overlay. In the second part of this article, I'll look at how the preview data can be run through the Sobel edge detection filter, and how the result can be displayed on the overlay.
Imran Nazar <tf@imrannazar.com>, Apr 2011.